We build bikes, not websites!

Wednesday, December 31, 2014

Workingman's CB750 seat fitment and frame modications

Here's what the stock tail section on the CB750 looks like - grab rail, tool box and a brake light that can also be used to send semaphore signals between fleets.


The owner was after a seat that was a little funkier than stock, but still comfortable as the bike was his everyday rider. We sourced a shorter unit that looks pretty good, but the frame has to be modified fairly extensively for it to fit.


That's us getting enthusiastic with a red marker - that's all the bits that have to go. Here's the rear loop bend and welded in place, ready for paint.


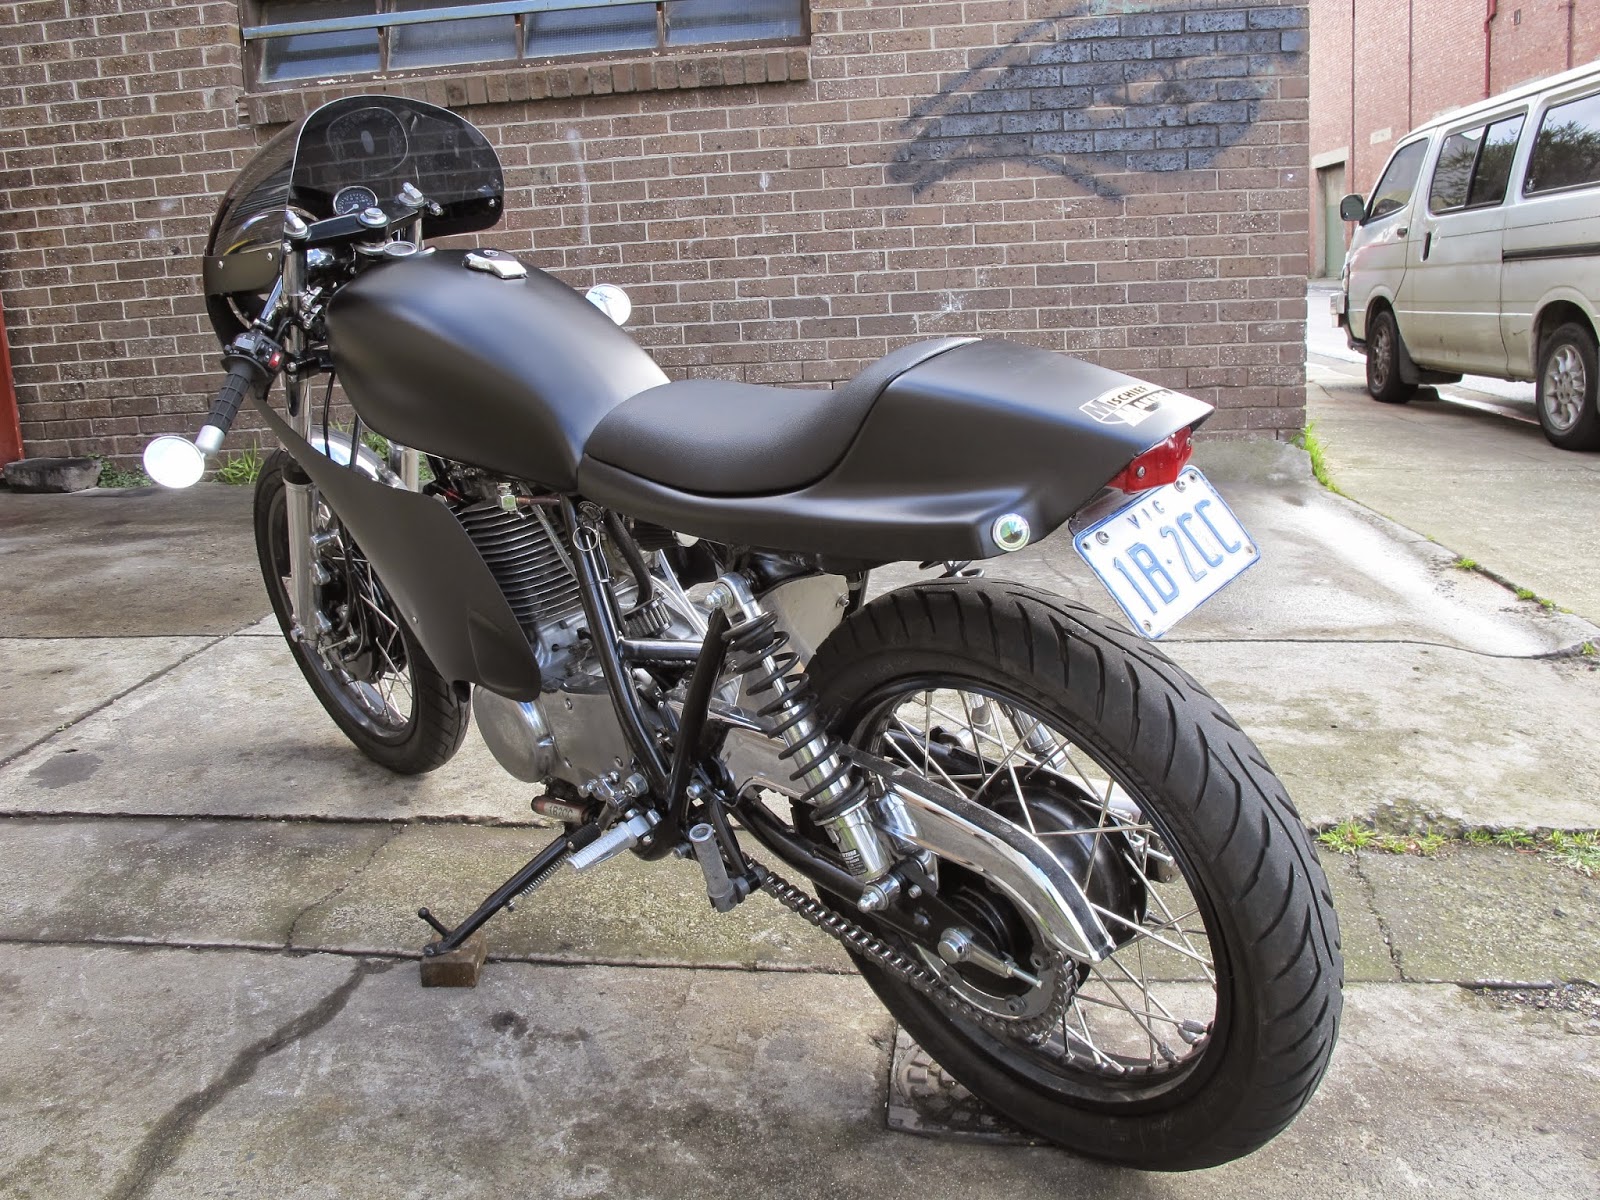
Now at this stage we'd ordinarily like to take everything out and 2 Pac or powdercoat the frame but as the customer wanted a bike that he would ride every day and 'never, ever clean' it was hardly worthwhile. But here's the seat in place...


Perfect. We also added a neat little brake light and some indicators but, er, we forgot to take pictures. Sorry about that. When you're on a roll, you know?

While we were there we also cut and folded that aluminium sidecover. As with the tank there's no polishing there - just the fold and cut marks cleaned up.


Workingman's CB750 Tank

Here's a tank swap we did some time ago.

The bike is a late 70's CB750 and the tank is an aftermarket aluminium number designed for the SR400. We cut the bottom out of it and fitted a new tunnel, and moved the fuel tap over to the left hand side.


It's now gravity fed rather than vacuum. Slots in quite nicely.


And this is my favorite bit - we fabbed up some new mounts on the tank so it can bolt down to the bike firmly - the tabs allow the seat, which is also an aftermarket item, to lock surely in place.


Saturday, December 27, 2014

The black CB750 all finished.

Here's the completed black CB750...


And some more detailed shots. The rearsets are a generic type and a backing plate had to be made from a 8mm plate of alloy, cut down to fit. The one plate also mounts the rear brake and exhaust to keep things simple and looking light.


A bank of the CR carbs. With the 865 kit on board, heavy clutch kit and with a proper exhaust the bike should run a lot better now than it did before.


That's a Joker Machine CNC'd top triple clamp. Bolted up nicely. I think a cast type might work a little better but to be fair it is an 80s CB750 so it makes sense. The speedo his a generic Posh unit or something like that and the bracket was made by us. It was drilled and finished for a row of idiot lights but after pairing down all the electrics it turns out that the bike can run without them.


Small headlight. The instruments, which are only just visible here have been chromed. It has a twin disc front set up and runs two brake lines the whole way rather than using a splitter box. The brake lines at the front and rear are stainless Goodridges.


The new exhaust system we fitted was okay, with the exception of the muffler. So we cut off around 8 or 9 inches and looked around the workshop for something that would suit. We scavenged this off our Bimota. 


And there you have it - a nice clean and simple CB750 cafe racer.


Some of the 'easier' things that we do.

And here's some of the more straightforward things that we did to the black CB750. Firstly, the ignition was moved to the front and tucked way under the tank.


Heavy-duty clutch kit installed.


A 'Dyna S' system was fitted from the pickups through to the brain. It ended up being a bit of a tricky job - while they can build great coils and pickups their control units take a bit of effort to get working correctly.


And a bank of CR carbs were fitted to make sure it breathes correctly.


Looking good so far.

Black CB750 - Making the seat and surrounds.

Here's a 1982 CB750 that we worked on a while back.

So first up, a little information about the seat, which was purchased from 'Benjie's Cafe Racer' in the US. It was apparently a straight bolt-on job but when it arrived it was twisted and bent out of shape and appeared to be fibreglass mixed with talc. We ended up spending 10-12 hours just trying to make the thing fit. Constant cutting and reshaping until we managed to make it work. In retrospect we probably should have cut our losses and just made a mold of the seat and started from scratch. It would have been quicker.


So after some altering of the seat the frame was cut and a new loop added. When this was done the seat matched up neatly...


There was more work to be done underneath the seat. The battery goes in the rear hump...


In that last photo you can see the beginnings of the work that we did under the seat. Brackets were made and stainless steel mesh was fitted to allow cool air to flow around the electronics. Other stainless plates were fitted and polished.


 And a plate was fitted in lieu of a fender. Small tabs welded up for this. Dry fitting it here to make sure all the screws were lined up correctly.


We did some more work which we'll outline in another blog post shortly. But in the meantime here's how the seat and rear frame looks at the moment. We think it looks pretty neat - especially given the quality of the item we had to work with in the first place! We painted the tank and seat in 2 pack gloss black.


Have you thrown some money on a part that needs some massaging to fit? Contact us for a chat to see if we can, cut, shut or weld to make it work.


Saturday, December 20, 2014

French Ducati exhaust

The next job we had for the French Ducati was to fabricate a 2 into 1 exhaust. We did all the sums to work out the best internal diameter of the pipe which had to match the exhaust ports - which had been opened up quite a bit.

The finished pipe also had to provide the most ground clearance possible. While people will often cite ground clearance as an important feature the owner of this bike actually needs as much clearance as possible. I've no idea if he's Rossi's second cousin twice removed but he absolutely hammers along on this thing and hasn't yet been seen slowing down for corners.


That line on the front exhaust with the '6' - that's the reference point for the cut on the rear exhaust. Damn close!
Once we'd fabbed everything up so the headers met at the same point - with less than 5mm in difference between the pipes - the internal diameter of the pipe was stepped up so that no restriction in gas flow occured.


Once tacked into place the headers were removed, braced in a cradle and gas purged for the entire welding procedure to ensure full weld penetration and smooth weld surfaces on the inside of the pipe. Which is, of course, where it matters most.


That side stand was a bugger!
The pipe clears the motor by around 2mm in three difference places. We love this bike and are really excited to have been a part of it's history.

French Ducati Carbs

The owner of this bike had taken a 900 Ducati bevel driven frame and had it modified around 14 years ago by the legendary Bob Martin to accomodate a later 900 belt drive motor. We came to meet the bike as it was entering it's next incarnation and Bob, who had, sadly, passed away by then, was no longer around to carry out the work.

Firstly, the frame needed to be modified so that a choice of dual and single seats could be used as desired. And... er... in our enthusiasm we forgot to photograph this bit. Sorry about that.

Onto the part where we actually did remember to take photos. A CNC machined 'reversed' rear cylinder head was bought from Germany. It was fitted so that the rear head could run it's exhaust forward and have the carburetter behind in the same manner that the bevels and the early belt motors had done.


Looking from the front, towards the rear of the bike.

If you zoom right in you can see the manifold that we fabricated for the Ducati. It's pretty unassuming, but surprisingly tricky to do.
This required us to fabricate, from scratch, a rear inlet manifold for the Keihin FCR matched to the front manifold. Sounds easy? Well we had to get it into what was a nearly impossibly small space for the bulky flat-slide units - pressed right up against the frame and aside the rear shock. Up against the frame? There's now 2mm clearence on one side, 4mm on the other and a whopping 8mm (!) gap between the carb body and the shock unit.


It doens't look like much but there's quite a bit of work in there - as often is the case with the best work that you can do on a motorcycle. We absolutely loved working on this very special bike. I like to think that we would have done Bob Martin proud.

#8 SR400 vs a very hard road surface (Spoiler Alert: The road surface won. Just.)

And here's what happened to the #8. These things are made to be ridden and it came to grief at Broadford. The fairing and windshield were cracked, exhaust scraped, bar ends torn out and part of the rear frame was snapped off. We've seen worse. And hey, nothing failed where it matters - the fairing mounts!


You can see on the right hand side where the rear frame has snapped, taking the indicator with it. If you find it at Broadford at your next track day please return it for a tiny reward.


While we're at it you're probably wondering about the headlight number. That's the same material that you find used as advertising on the sides of trams and buses. It only cuts down on the emitted light by around 5%, so it can still work beautifully at night.


So, like the phoenix (or a Hyundai i30 involved in a minor collision, but we'd rather stay romantic about these things) the bike will rise again. And better.

A new fairing was fitted and the snapped rear frame used as an excuse to cut it down properly and fit a new seat, with indicators that match the front flush-mounted ones. It's looking nearly complete now. But really - are these things ever finished?


Crashed your bike and need it repaired? Why not contact us. But to be honest we're probably not all that interested in repairing your CBR600F4i's crash damage, fantastic bike as it is. But if you have something a little bit more bespoke that has taken a tumble - I'm sure we can find space in our workshop for your Brough Superior!